Access Level
Chamasoft gives the user the ability to set different levels of the group access to different members i.e. admin or not. Group administrators have the full access to the investment group. (They can add members, update accounts, suspend members, delete members etc.)
Once you create a chamasoft account, you are automatically given the group administrator privileges. This does not limit you to add another member as an administrator.
To give a member administrator privileges;
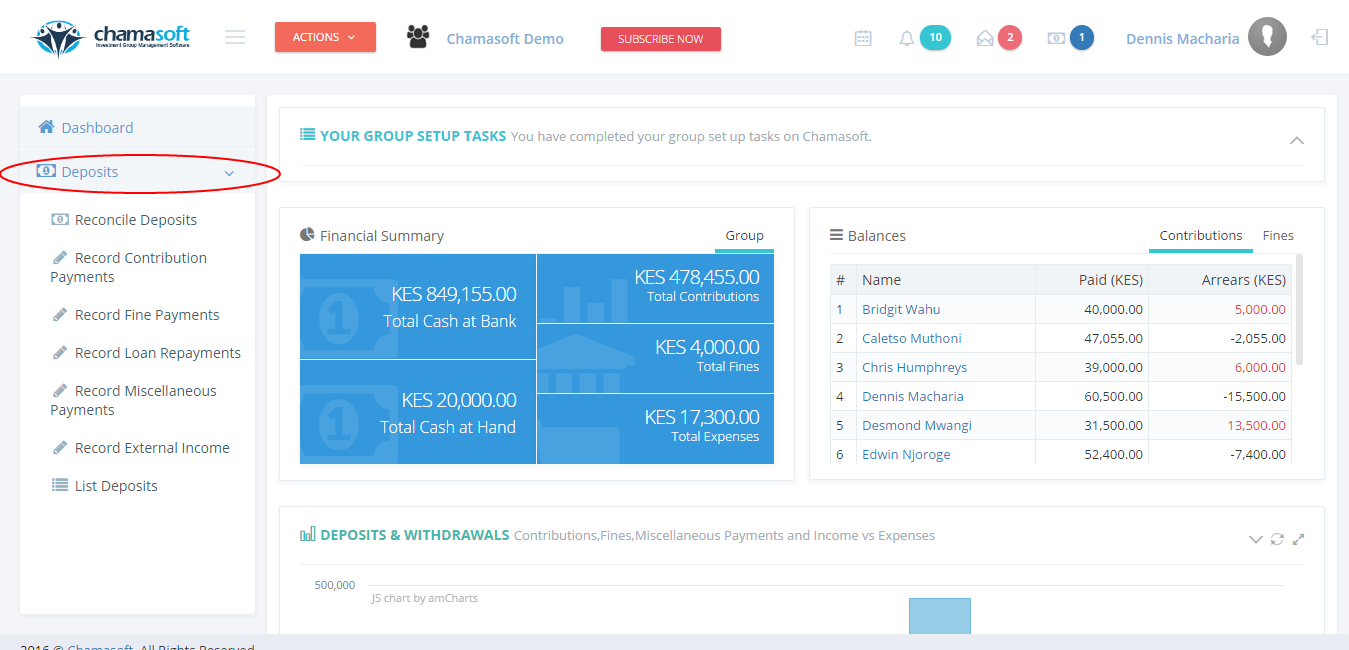
- Go to Members>Membership Management>List Members
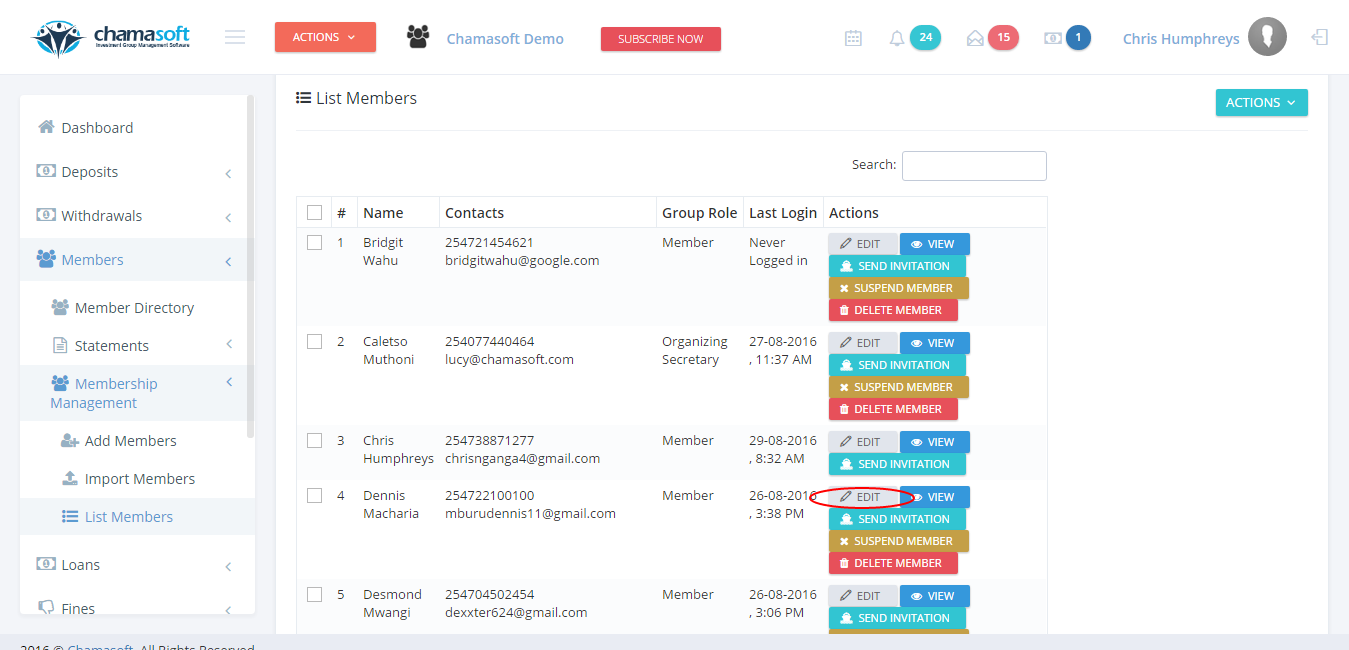
Choose the member you wish to add as admin from the list and click on edit as shown above.
2. From the members personal details, scroll down to Access level just below Member Role.
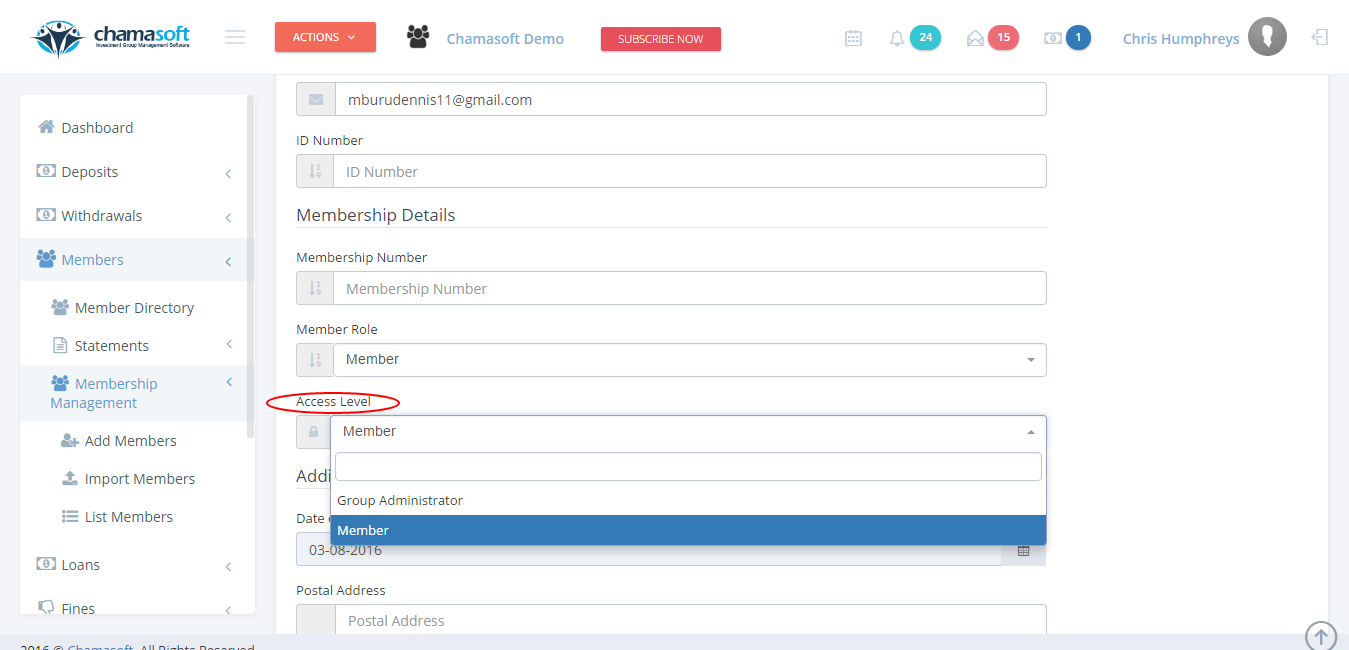
Click on Access Level and select Group Administrator.
Scroll down and click on SAVE CHANGES.
Access Permission
This feature helps the group administrator assign specific permissions to specific group roles.
Once you have created group roles (eg. secretary, chairperson, treasurer etc.) according to your investment group, this feature helps you assign permissions, which will in turn be assigned to specific members to determine what these members can view or manipulate on the group.
To create an access permission;
- Go to Settings>Group Roles>Access Permissions
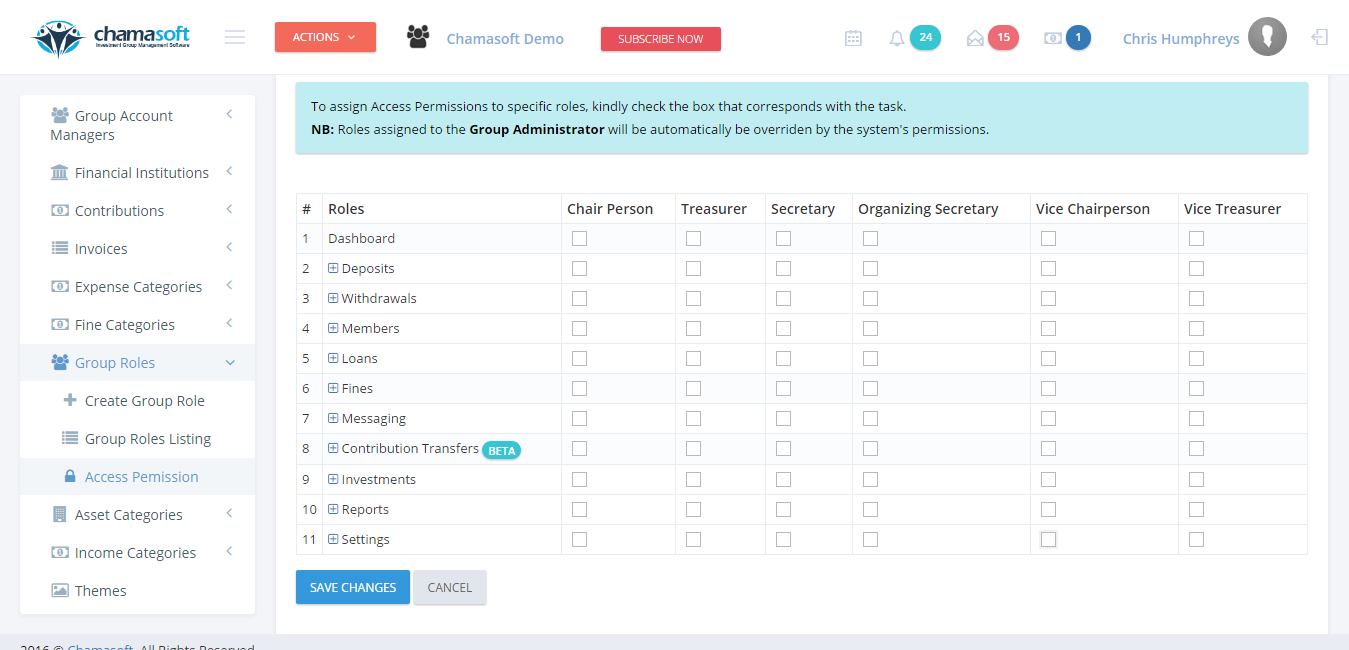
This views columns of all chamasoft menus and rows of all your group roles.
Click on the plus button on a specific menu to view additional submenus as shown below.
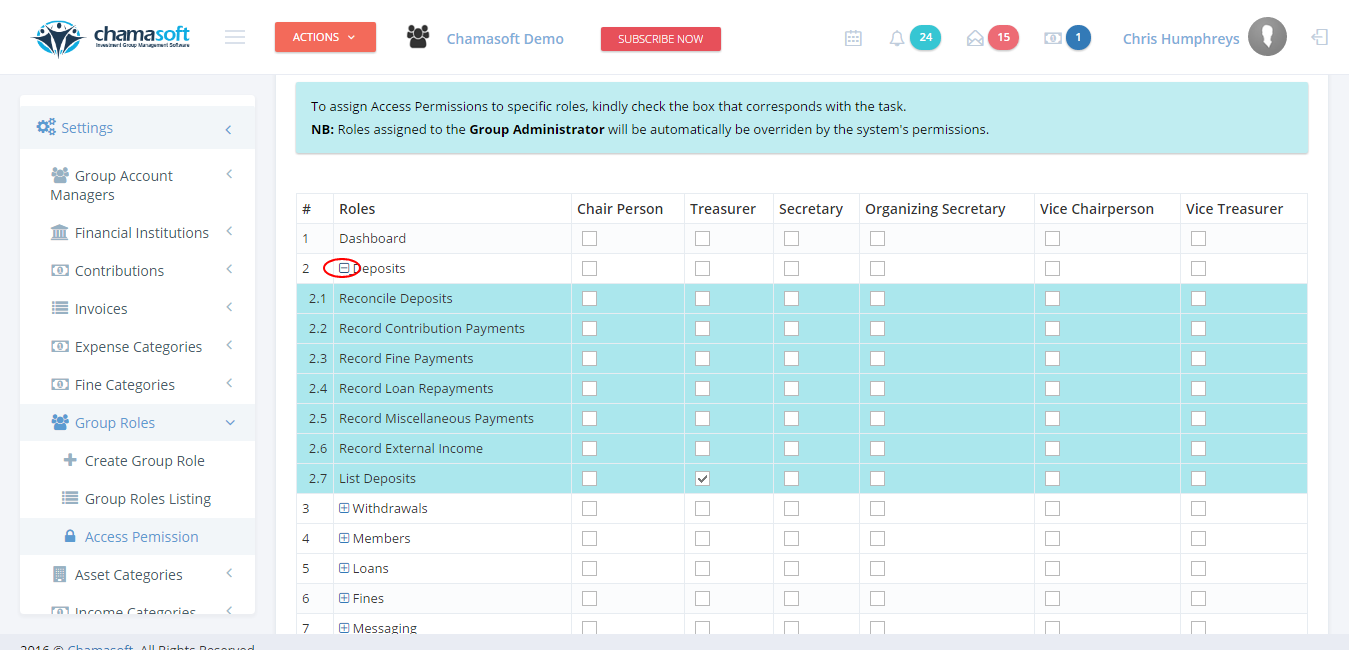
2. To assign a specific role, kindly check on the corresponding permission.
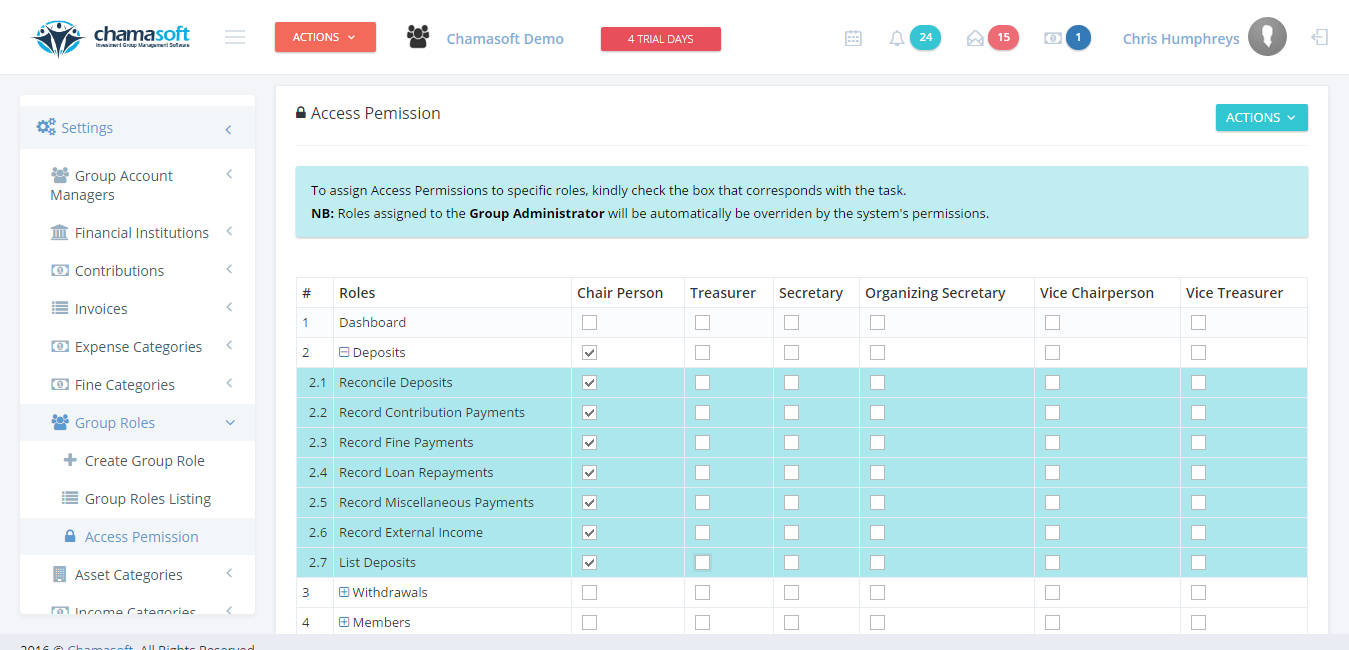
This assigns the a role e.g. chairperson the permissions to access deposits menu.
Click on SAVE CHANGES to save the permission.
Assigning Member Roles
Normally, an ordinary member (non-admin) can login to chamasoft with their credentials (i.e. phone number or email address and password). Here they can only view their account details and the group dashboard summary however the group admin can assign specific member roles to specific members based on different access permissions.
To assign a member role;
- Go to Members>Membership Management>List Members
Choose the member you wish to assign a role from the list and click on edit as shown above.
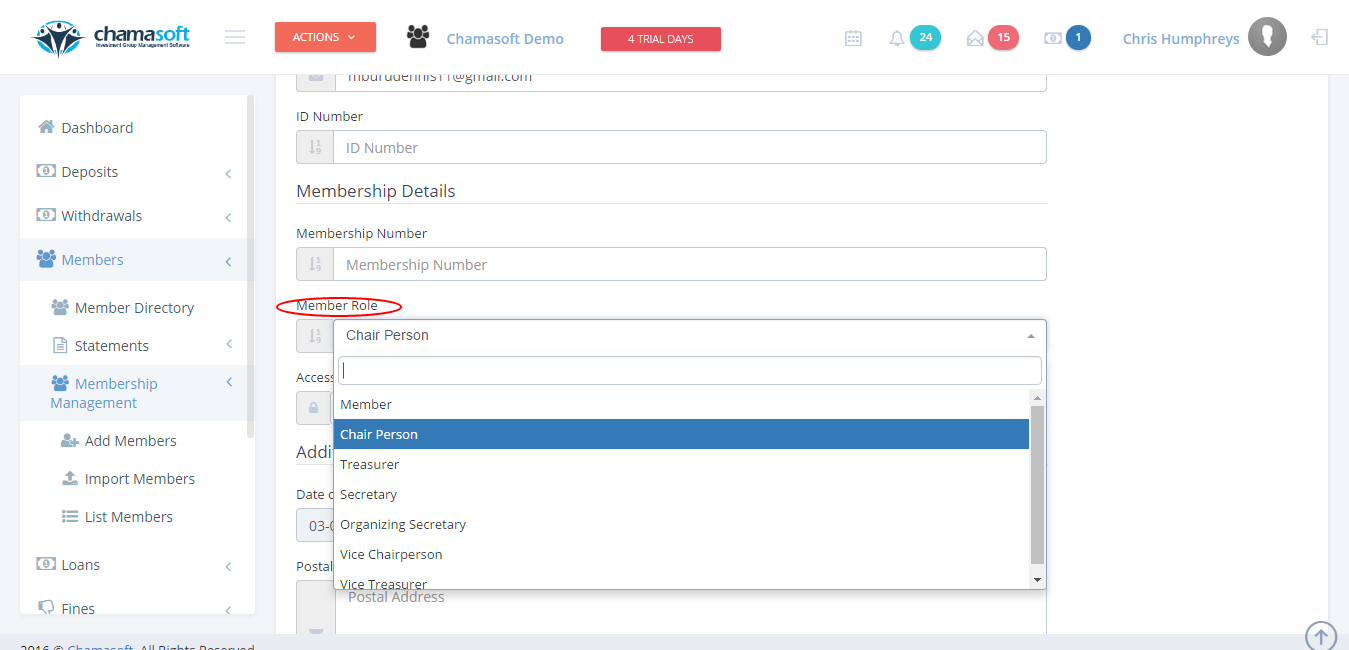
select the role you wish to assign to assign and click on SAVE CHANGES to save.
Example: I assigned the group role “chairperson” to access permission of the deposits panel. Then i assigned a specific member to this group role (chairperson). Now the member (who is not an administrator) is able to access the deposits panel upon logging in using their credentials.